 |
|
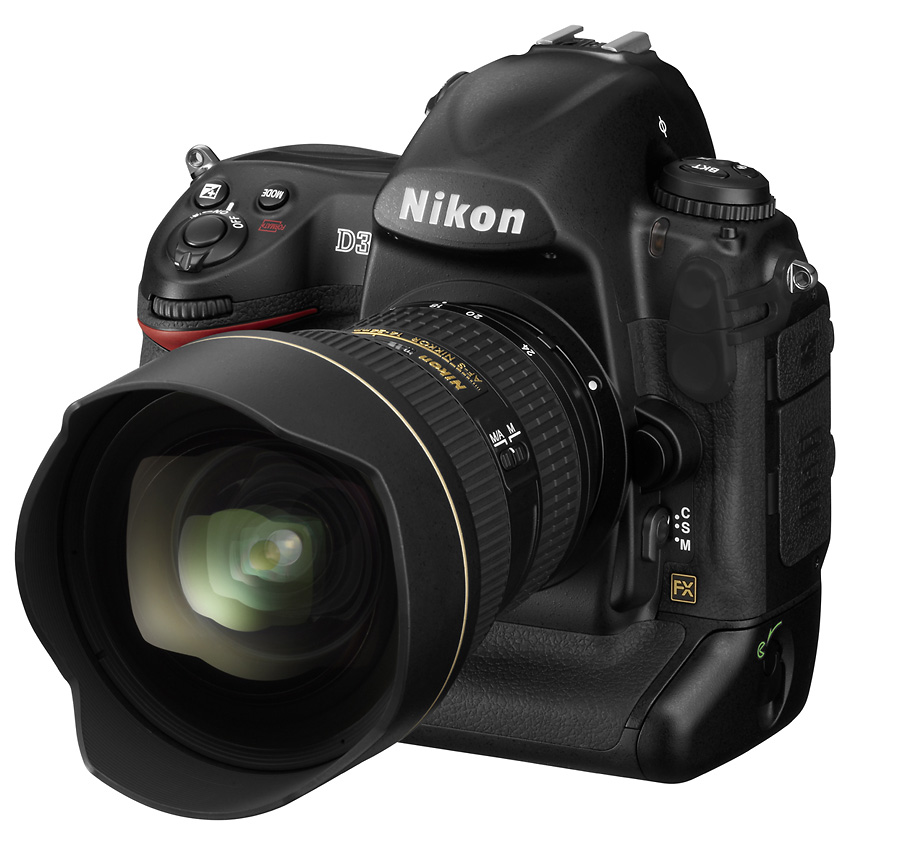
Nikon D3: Sleek external appearance and the bigger prism befitting its FX format, but otherwise no warning of the power lurking under its bonnet |
| Nikon D3 Digital Camera Reviewed | |
| by Bjørn Rørslett | |
2.
Appearance and Handling
The Camera
The Nikon D3 follows the general body concept of the earlier models in the D1- and D2-series. The contours are rounded and make the camera fit the hand like a glove so to speak. The size of the camera is comparable to any of the earlier top models such as an F5 or D2X. The weight, with battery pack, tips the scales around 1.3 kg which ensures the camera has a suitable heft for giving steady hand-held shots. Many users, not familiar with pro-calibre DSLRS, might wish for a lighter camera and overlook the benefit of having a substantial mass behind your lens. The balance with the typical professional f/2.8 zoom lenses or a 300/2.8 telephoto is just about perfect. So, in conjunction with a unprecedented firing rate up to 9 frames (FX) or 11 frames (DX) per second and its impressive technical specifications, all of this clearly mark the D3 as an action shooter’s dream come true.
The appearance of D3 is nearly identical to that of the D2X itself an evolutionary improvement of the earlier D1-series. However, upon closer examination it becomes clear that evolution didn't cease with the D2X, since subtle yet important changes have been made in the way the camera feels and handles. Controls on the rear have been slightly relocated to make using them even easier and more positive. The high shooting rate up to 9 frames/sec while maintaining 12.1 MPix images, or up to 11 frames/sec in DX ("cropped") mode, in which only the centre of the imager is employed for recording pixel data at 5.1 MPix, makes the camera more versatile. The new 5:4 format gives 10 MPix and is considered to give a faster workflow without the need for cropping, if your shooting applications give 8x10" prints.
|
|
Nikon D3: Sleek external appearance and the bigger prism befitting its FX format, but otherwise no warning of the power lurking under its bonnet |
The 12 MPix sensor of D3 is of a CMOS type and thus continues Nikon's commitment to CMOS imagers that was initiated with the D2X camera in early 2005. Nikon engineers claim that their LBCAST technology is incorporated in the new sensor chip, but no additonal details were disclosed to the audience during the Tokyo Launch of the D3. The same can be said of the layout of the photosites on the chip that is said to comprise a double-lens design, one micro-lens on top and another inner lens to boost the efficiency of the photosite. Nikon officials told the Press this much during the D3 Launch in Tokyo 23 August, 2007, but kept all further details under wraps.
The camera has a shutter tested to no less than 300 000 actuations and with a true machine-gunning capacity of running up to 11 fps (DX frame). I witnessed shutter units being tested off the assembly line at the Nikon Sendai factory and found it near unbelivable that a mechanical contraption could stand such stress, but obviously the shutter is carefully designed to do exactly that. The autofocus circuits give up above 10 fps, by the way, so the actual focus will be set by the first frame of the burst if you run the camera at maximum firing rate.
In use, the camera handled with utmost ease and the location of most controls felt very "correct" and enabled a relaxed, highly intuitive operation of the camera and all its features. Any Nikon user will take an instant liking to this camera and I suspect it'll work its endearing magic on quite a number of other people, too. The camera simply feels like an extension of your mind. The start-up time when power is switched on is a mere 120 millisecs, and the shutter release delay is just 37* millisecs.
* Measured according to the new CIPA standard of August, 2007, the delay is 41 millisecs. Still quite fast I'd say
The finder gives away the FX format sensor buried inside by being bigger than the earlier DX models. Looking through the finder of course reveals a perceptably bigger field of view than on say the D2x. The finder appears clear and bright as well. However, you could criticise the less than optimal eye-point relief that forces the eye a bit closer to the ocular than I would prefer. The eyepoint is just 18 mm compared to 19.9 mm of the D2x, and the apparent finder magnification with a 50mm lens set to infinity is 0.7x against 0.86x for the D2x. The information displayed inside the finder is very legible bright-green characters set against a dark background. To the right-hand side, there is a bar-type display showing exposure deviation from the zero point of the camera's meter. I should prefer to see this data displayed at the top of the picture frame so that spectacle wearers could see it without squinting so much. That way the viewer magnification could have been increased, but the prism head would then have probably had to be larger. For now, it is a do-able compromise.
I'd rank the finder of the D3 a little below the F5 in its perceived quality, mainly because of its eye-point relief. The brightness of the finder screen as such is good and focusing fast lenses is quite easy and evidently can be done with excellent accuracy as well. If any of the "cropped" image modes (DX, 5:4) are selected, the outer non-used area of the finder frame is darkened (like on the D2Xs with Hi-speed crop mode). There is, also on the D1- and D2-series, an ocular blind that can be engaged when you work the camera on a tripod or similar so as not to give false meter readings.
For any seasoned Nikon user, being familiar to a D2-series camera will ensure you can pick up a D3 and start shooting with it almost at the blink of an eye. The layout of the camera’s controls is reassuringly similar and imparts a familiar view. When you put D3 side by side with the D2X, you should admire how the designers kept the overall layout yet allowed for the huge new LCD panel by pushing the left-hand strip of control buttons towards the edge of the camera body and leaving the right-hand side controls virtually untouched.
Later, you begin to appreciate some of the changes and improvements that have been deployed with the D3. For example, the command wheels now are set at a slightly tilted angle so your fingers will meet the control in a more optimal fashion. Perhaps not the best thing since the invention of sliced bread, but comes quite close actually since operating the camera now does become even smoother and effortless. The multi-purpose button now has a defined centre area, very helpful for entering textual comments and suchlike, something which could be a nightmare on the D2x because your finger would slip and the wrong data could be keyed in. That happened all the time for me and was a real nuisance.
Buttons for setting ISO, white balance, or Image quality are located under the rear LCD panel, just like they occurred on the D2X. On the top deck, almost nothing has changed from the earlier model. The relase mode dial sits to the left on the top deck and is similar to the solution used for the D2-series, with the addition of a "LiveView" (LV) position. More stuff on LV later.
ISO settings are 200 to 6400. You can lower sensitivy below the 200 ISO base level by Low (0.3, 0.7, 1) or approximately 160, 125, and 100 ISO. On the high-ISO side, there are Hi (0.3,0.7, 1) or approximately 8000, 10000, 12800 ISO, plus the last-ditch resort setting of Hi 2 which is about 25600 ISO. Please note that outside the calibrated 200-6400 ISO range, the values are not exact and you can't rely on the usual interchange between aperture and exposure duration. Thus, at Hi 1 you are not guaranteed that you can stop down 1 EV from your 6400 ISO exposure.
The AF-ON buttons on the rear deck have been moved a little and the one for landscape orientation is set well apart from the AE-Lock button. So you are less likely to press the wrong button. However, during the move the AF-ON also was sunk deeper into the body contour so is less easy to push when you’re wearing gloves. This inconvenience is partly off-set by the portrait AF-ON button now being relocated so it sits higher than the command wheel when the camera is swung into portait mode, this makes it far less likely to do accidental AF. The command wheels are set at a slight slant so they fit your hand better.
The rear LCD is huge and has a true VGA (640 x 480) pixel resolution, made up from 922 000 individual dots. The view is crystal clear and well readable within a wide range of view. The sharpness of the captured image can be assessed in fine detail by zooming in 13 x or more. Depending on the image area, up to 27X magnification can be reached (FX format).
The LCD display is an amazing improvement on the earlier models and you’ll soon consider it being indispensable for the daily work with the D3. Many people have voiced concern about the lack of a protective cover for this LCD. However, being made of tempered glass it has high resistance to impact and scratching. Thus, even a deliberate attempt to mark the surface by a sharp knife was unsuccessful. You will get a load of fingerprints and nose grease covering its surface after a while of course, but all that grime can easily be swept off by a soft tissue or similar.
 |
|
The rear view of D3 shows virtually identical layout to that of D2X, but the lower AF-ON and focusing controls are relocated a smidge for improved access and control. |
Inside the finder, the bright screen has a large number of AF points, up to a maximum of 51. The 51 AF spots are packed into the centre of the frame. Thankfully, you can use fewer AF areas, the choices being 1, 9, 21, or the entire gamut of 51. For these options, the active AF area is made up by a main point and the "helper" points encircling it. So if the subject is detected to move away from the main point, another in the agglomerated group takes over. For my own use I ended up setting the camera to employ only the centre AF point. That enabled me the most predictable and accurate AF operation (if used in conjunction with the AF-ON button, see below).
Besides having AF activated by the shutter release and the AF-ON button(s), you can remove AF from the release to the AF-ON only (my recommended setup). There also is a 3-D AF tracking mode when all the 51 AF spots are employed, and this mode can be fine-tuned by setting the tracking time to long, normal, short, or none (the latter effectively disabling 3-D AF). The degree of user configurable control of the AF system is amazing and ensures anyone can get the AF system to provide the maximum benefit and focus assistance. Even with the cropped modes, you will have all AF spots included in the frame, an improvement to the D2X where the cropped mode moved some of the AF points outside the actual frame of view.
Focusing with my AFS lenses is extremely fast and responsive thanks to the new, advanced AF sensor technology (Multi-CAM3500) of D3. Focusing tracking performed as it should, according to my brief test shootings (this is not a feature I normally use, though). Of course all the trendy new AFS and VR technologies are supported by the D3. Since the AF sensors each covers a smaller fraction of the frame, you might have to adjust your approach to doing AF with the D3 compared to its predecessors. My recommendations are to rely on the AF-ON buttons in conjunction with the AF-C mode for shooting, plus combine with AF dynamic mode if this suits your subjects and style of shooting. If you rely on doing AF by activating AF action with the shutter release, then recompose for the shot, the first frame will probably be OK but the next shot is almost certain to go out of focus since AF system now discerns the depth of the scene with much higher precison than before. The 3-D AF system works in an ideal situation, but isn't entirely reliable in field use. My gut feeling is that this was thrown in for good measure and that the technology needs to mature before it can be considered reliable enough for practical shooting situations. Reading the appropriate pages in the manual that deal with the AF system is highly recommended.
There is an interaction between AF and firing rate that can be potentially confusing. If you set continuous shooting speed (Custom menu option d2) to 11 fps, this entails that only the first frame is focused using AF and the rest of the frames will be captured with the same focus as the first when you shoot in release mode CH (Continuous High). Some users report this setting also disables AF-C, something I cannot verify with my D3.
The D3 lacks the conspicuous "eye" atop the finder head, so looks a bit different from its D2-series comrades. Instead of using the external sensor for measuring colour balance, the D3 employs sophisticated pattern recognition methods in conjunction with the matrix meter and the 1005-pixel RGB internal sensor that is incorporated in the finder head. Nikon says this will give more consistent white-balancing than for the earlier models. My experience shows this claim does have some validity, but in common with D2X, some situations are too difficult to cope with even for this clever design of D3. Thus, I wasn't entirely impressed with the auto W/B or dedicated Incandescent W/B under incandescent lights, even when using AFS lenses. The images consistently were too yellowish in this case. As this kind of light is very deficient in blue, there are obvious limits to what can be achieved in terms of proper white-balancing anyway. The end user should be aware of that basic fact, although many aren't. If you wish to preserve the maximum of colour fidelity under incandescent lights, adding a blue filter to the lens will help a lot towards this end and it cuts down on the image noise as well.
The metering system employs the traditional matrix, spot, and centre-weighted, modes. As long as lens data is known, a colour matrix metering is in force and when the lens has "D" (distance) capability, ie. is a "D", "G", or "AFS" lens, the 3-D colour matrix meter is active. Nikon says the new camera uses an improved Scene Recognition system that combines pattern and colour recognition with AF and distance metering to give better final outcome. Or so the press release claims. I'm more of a sceptic in this respect.
Flash insights
Digital flash technology has long been a source of frustration for the end users: no problem when everything works, lots of grievance when you're left in the literal darkness or the entire energy load of your batteries make a giant pop - and that's it. I'm happy to report that D3 was quite civilised with my SB-800 flash. No surprises in any direction, provided I dial in a slight + EV correction to the exposure. On default settings, D3 files with flash were a little underexposed to my liking. All flash modes, front or rear curtain sync, worked perfectly (with +0.3 to +0.7 EV added). Possibly the dialed-in exposure correction wouldn't be necessary were I to understand the manual of the SB-800 and the i-TTL technology. I have scrutinised the SB-800 pamphlet but still haven't a clue as to how this differs from my existing d-TTL flash. I'm a dimwit in this department, obviously my holding a Ph.D. doesn't help much for such practical chores.
The D3 may not show the same brain-dead approach to close-up flash photography with "D" (and thus also, by defintion, "G") lenses as exhibited by the D2X. The earlier model cannot imagine the flash is not attached to the camera and thus, if you put the flash close to the subject and connect through a SC-17 cable or similar, the flash expsure will blow the subject to high heaven. With the D3, I obtained perfect flash exposures also under these condtions. Well, so I believed until I expanded my tests to comprise more lenses. Results always have to be verified and then verified again. It turns out that the close-up results are highly variable, possibly depending on the lens, since the AF 70-180 Micro-Nikkor and the old workhorse 105 mm f/4 Micro-Nikkor both exhibited perfectly exposed flash images, whilst the Voigtländer 125 mm f/2.5 APO-Lanthar consistently gave grossly overexposed images and the AFD 200 mm f/4 ED-IF Micro-Nikkor sometimes did well sometimes the exact opposite. My best advice is to do some careful initial experiments to see how your own gear stack up for such close-range occasions, and if there are issues these might be dealt with by judiciously applying an EV correction to the flash output. Or going the traditional route and using a flash in manual mode. Nikon might think that all users are better served by their dedicated ring-like "macro" flash, the RC1. I don't think so since the lighting it provides is way too flat for my taste.
File formats and sizes
The camera can output its images in various file formats. There are options for RAW (NEF), jpg, TIF, and combinations such as NEF + jpg. The default NEF format is 12 bit lossless compression but you can change to 14-bit depth for the NEFs. The compression options are lossless, lossy, or uncompressed. Jpgs can be optimised for file size or quality. The internal EXPEED processing engine uses 16-bit processing along its entire pipeline until the final output stage. This ensures maximum preservation of fine detail and tonalities in the output image files by preserving the numerical accuracy in the calculations. File sizes for the NEFs will vary significantly depending on the options that are set by the user. The 12-bits NEF stay around 14 MB. Perhaps around 16 MB is an average for the 14-bit NEFs with lossless compression, but I've seen file sizes occasionaly as high as 25 MB. Jpgs fluctuate in size like always and I have seen jpg(fine) ranging from scarcely 1 MB up to near 10 MB depending on subject and whether optimised file size or quality is set as the preference.
The D3 sports dual slots for Compact flash (CF) cards. You can select different configurations as deemed necessary. Either let card 2 kick in when the card 1 overflows, or have the same file written simultaneously to both cards (as a security measure, this will provide the equivalent of a RAID-1 Mirror system). Other options are to have NEFs written to one card, jpgs to the other, or you can manually copy files between the cards. When you format the card(s) in-camera by concurrently pushing in "Delete" and "Mode" buttons so the upper LCD panel flashes "For", the default is to format only the card in Slot 1. You can move the focus (pun intended) to Slot 2 if you play a little finger tap-dance using the main command wheel and removing the hold on the "Mode" button when "For" is flashing on the LCD. The manual isn't much helpful in this respect. The alternative is using the menu system, in which you can specify the Slot to be formatted.
There are plenty of features such as Active D-lighting, Picture Control and so on that rely on the subsequent use of Nikon proprietary software, or alternatively, that jpgs are the final output. This makes these features less interesting because Nikon Capture NX 1.3 is what I politely would describe as being "not very good" software.
Battery performance
Without a power source, any modern digital camera is just a dead brick. Hence the battery performance becomes an integral part of the camera's behaviour. The D3 can use both the new EN-EL4a (2500 mAh) Li-Ion battery pack and the older type EN-EL4 (1900 mAh), so can share batteries with the older D2-series cameras. This makes it easier to support a mixed system with D2- and D3-cameras. However, the battery pack requires a different end cover cap (BL-4) from the D2-series. These covers are easy to replace and even more easy to lose, so keeping spares is recommended.
Nikon reports two figures for battery performance, 4300 and 4700 shots for CIPA and Nikon-specific tests, respectively. In a setup under lab conditons, both values were confirmed or surpassed with a clear margin. See the graph below for more details on this. My test of the EN-EL4a shows among other things that the on-board control chip is near perfectly linear calibrated, so the reported remaining percentage of the capacity is very reliable. This obviously is hugely important when you contemplate if sufficient battery power is available for a shooting.
|
|
Lab test of the EN-EL4a battery capacity confirms Nikon's reported figures in the D3 User's Manual. The D3 was hooked up to a Nikon MT-2 intervalometer and rattled happily away for days on end. |
Lab testing is one thing, but in the longer run field use has more relevance. However, capacity figures then cannot be compared between users, only for a given user shooting the D3 in the same fashion as another camera (longitudinal comparison). Many people don't understand this important caveat so go on to claim they must have a bad battery because they cannot get the equal number of shots as reported by other users. For my own use, I get on average slightly over 400 shots per charge with the D3/EN-EL4a, which is less than 10% of the nominal capacity in the test above, but is 20% better than my D2X. In fact, I use the very same EN-EL4a pack that extended its working capacity to no less than 5198 shots under the specified test conditions (see figure legend, above). This goes to show the wide range of shots per charge people get under realistic field situations. Obviously there is a variation by an order of magnitude in play here.
Whatever figures you arrive at, having spare battery pack(s) at your disposal is a must for any serious shooting with the D3. The EN-EL4/4a packs can be charged using either the MH-21 or MH-22 chargers. The new MH-22 can charge two packs but not concurrently. You insert both packs and the charger works them in sequence. If a recalibration of the microchip inside the battery pack is required, you press the corresponding button and let the charger do the rest as it will switch into charging mode once the recalibrating process is completed.
For the D2X and its EN-EL4 power source, the longevity of my battery packs has been less than 3 years. The first packs started to die after 2.5 years of heavy usage. It is reasonable to expect the EN-EL4a unit to show a similar life span. This implies you should factor battery replacements into the total cost of ownership for the camera.
Dusting off the dust
Digital cameras and dust is an inevitable phenomenon. They are the antithesis to Kipling's lyrics about the East and West. It should not come as a surprise, given an imager twice the size of a D2x , that the D3 is more susceptible to attracting dust onto the imager. Since you often shoot at smaller aperture settings with the larger format, this also makes dust more visible in the captured shots because of the increased depth of focus.
If you swap lenses a lot like I do, you really need to pay attention to the dust issue and clean out the camera on a regular basis. Blowing out the specks of dirt, metal shavings, and dust, from inside the camera’s bayonet mount should be done frequently. If time permits I try to do this each time I change a lens. The imager itself seems to be easy to clean using a simple air blower and I made a habit of doing this on a daily basis. However, this measure will not completely remove all stubborn spots. Dust seems to cling more tenaciously to the imager surface on the D3 than on the D2X. So sooner or later, more efficient methods for removing the persistent spots are called for. My usual friendly Nikon tech is the solution for me. For those of you doing this on their own, my sympathy is on your side. The only relief is that there now is a dedicated setting to keep the shutter open while the cleaning occurs, and you can do this also with a battery-powered camera, no mains adapter is necessary as it was initally on the D2X.
There is of course also the possibility of making a "Dust off Ref Photo" (D3 manual pp. 351-352). This can be used in Capture NX to map out dust spots. However, since the lighter dust spots often move around when you shoot, the usability of such a feature is quite limited, and not everyone will take a liking to the Capture NX software either.
| Nikon D3 Reviewed |
