| All You Ever Wanted to Know About Digital UV and IR Photography, But Could Not Afford to Ask | |
| All You Ever Wanted to Know About Digital UV and IR Photography, But Could Not Afford to Ask | |
12. Which Spectral
Bands? Composite Compositions Explored
This section aims to throw light on the variability in image expressions due to spectral bands being combined in a number of arrangements. Typically, you need to support the camera on a sturdy tripod if more than one exposure is needed to achieve the final picture.
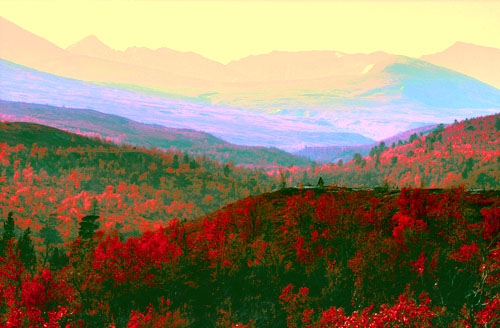
With the digital camera, we already know it is feasible to combine two disjunct spectral bands, those of UV and near-IR, in a single recorded image. If this digital UV + IR technique is applied to landscape photography, the ensuing image will be a curious mixture of softened and enhanced visual elements. For example, ultraviolet renders distant scenery very hazed and soft, whilst infrared cuts through the haze to give strong contrast and high sharpness even at distance. See example below.
|
Mountain Colours Nikon D1, UV-Nikkor
105 mm f/4.5, Nikon FF stacked with Tiffen Hot-Mirror This is UV and IR combined, showing a strange mixture of the features characteristic for each spectral band. |
Within the UV + IR landscape image we can see bands of colours arising from the current combination of UV and IR at that distance. Since these parts of the spectrum tend to influence different channels on the CCD, a variety of subtle colours may result.
Another way of expressing the invisisible colours from either UV or IR, is to make a false-colour scheme with contributions from some band(s) of visible light. Oh well, "false" isn't the apt designation because we already know any colour coding is acceptable when non-visible spectral bands are concerned.
One possibility is "transponding" the colour coding one step down. This entails using the green band as red, blue band as green, and ultraviolet as blue. Obviously, you need to combine at least two separately recorded images to achieve this. With a film-based system you would have to make three exposures each through the appropriate narrow-band filter (e.g., Wratten 58 green, 47 blue, and 18A for UV). With a digital SLR, you can easily extract both the blue and green channels from a single frame, so you get away with only the additional UV exposure, preferably combining the UV bandpass with a hot-mirror filter to reduce IR contamination.
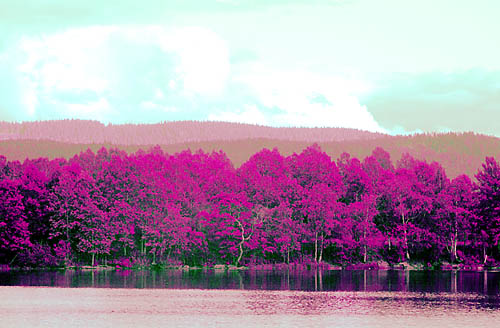 |
Ancient Forest |
Colour-coding with UV = blue, blue = green and green = red |
Nikon D1, UV-Nikkor 105 mm f/4.5 lens,
UV image: FF + Tiffen hot-mirror; green and blue
extracted from image shot with L37C and Tiffen hot-mirror
to eliminate UV and IR |
Alternatively, you can experiment with other combinations; for example, UV + green + red, or UV + blue + red, or any other combination taking your fancy. You obviously can assign the primary red, green, and blue colours to any of the bands employed so a plethora of colour schemes can be devised. Some of the colour schemes definitively induce a feeling of sea-sickness so be careful not to overdo the massaging of the image.
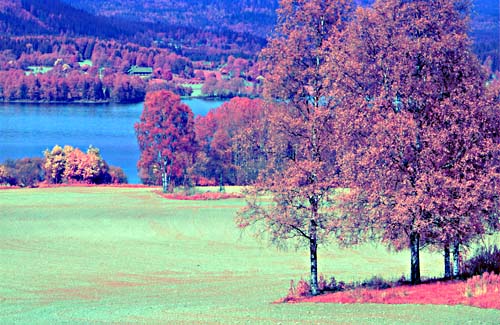
The final variation is merging all visible bands into a single colour, typically green, and let UV and IR take on their assumed colours, blue and red, respectively. This time you have to shoot three separate frames which afterwards are combined to form a single image.
|
Rural Landscape |
| Nikon D1X, UV-Nikkor
105 mm f/4.5 lens, combined visible - UV -IR Visible light: shot with L37C
and Tiffen hot-mirror filters |
If you ever want to go further than this, I'd recommend looking into some of the approaches I have given in my "Far Side" section. In particular, you should have endless opportunities when frames taken in various spectral bands over time are combined.
| All You Ever Wanted to Know about Digital UV and IR Photography, But Could Not Afford to Ask |