Approaches
to Afocal Photography
By Bjørn Rørslett
Many people have contacted me
wondering how the afocal images
shown on my web pages were obtained. When I told them the
"secret", most simply laughed and thought I was pulling
their collective leg. So much for being sincere. Seems I have to
publish the "method" in detail after all.
As I wrote in the Introduction to Far Side, refractory processes take place in Nature
all the time. This is essential to afocal photography, thus,
"Afocal photography, another lensless
approach, doesn't use an aperture at all and the imaging rays
are recorded directly onto the medium. If all rays striking
the medium are randomly orientated there will be no
perceptible density variation in the image and no meaningful
photograph can result. On the other hand, if the rays are not
random at least within a sector of space, variations of image
density occur to give rise to a photographic image".
People still didn't get it.
Obviously, I have to be more explicit. Thus, the images below
show the "equipment" I used for taking my afocal
images. This is the truth, the whole truth and (almost) nothing
but the truth, folks. I said "almost" because a b/w
recording media cannot exhibit colours without a certain amount
of digital tweaking. This is obtained simply by scanning the b/w
record as a colour image and subsequently "massaging"
the tonality curves in Photoshop.
|
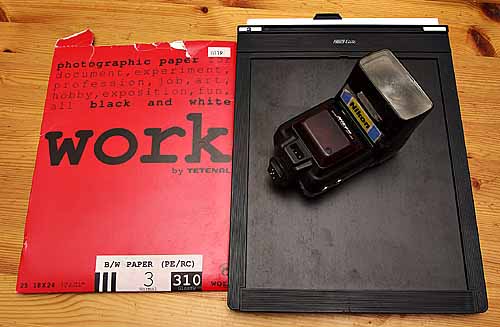
| Essentials of
Afocal Photography I: Sheets of b/w photo paper, an
8x10" film holder and a flash. Load the film holder
with photo paper and expose the sheets at will. No lens,
no aperture, just pure afocal photography! For
daredevils, I recommend substituting 120 format print
film for the b/w paper and a roll-film holder for the
sheet-film cassette (in fact, I have tried this too). Be
warned though that only the sheet-film holder can be used
under water! |
Why the flash? Well, you have to
stack the odds in your favour. A water surface refracts light
rays to an amazing degree, but the "image" focused by
the water surface jumps back and forth in spatial location all
the time. Without the flash, you'll be hard pressed to get a
clear image at all because the refractory processes
"smear" the potential image. Basically you need a short
exposure and that's what the flash brings about. However, I have
obtained quite good images at night without the flash so it's not
essential for acquiring afocal images. Also, some afocal images I
did during day-time were captured without using a flash at all
because the sun was up.
|
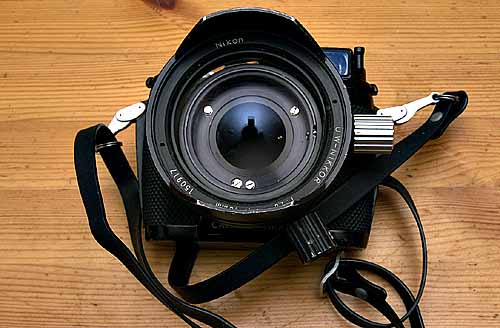
| Essentials of
Afocal Photography II: Nikonos body, without lens. This
is my setup for afocal UV photography under water. |
Lest you should exclaim
"Gotcha - He's using a Lens", I beg you to examine the
picture displayed above. Yes, it is a Nikonos-II camera
(essential if film is to be brought under water), and yes, there
is the casing of an 15mm Nikonos lens mounted on it, but where is
the lens itself? It simply isn't there because I removed the
optics of a drowned UW-Nikkor 15 mm and kept the casing for
experimental use. In lieu of a lens, there is a Hoya U-360
visually opaque filter placed inside the lens casing. This
filter, appearing virtually black, is transparent to UV rays. I
load the Nikonos either with with Fuji RTP (my standard film for
UV colour photography), or with Fuji SG100 print film, and
happily set out shooting afocal images under water. Count on a
very small ratio of keepers ...
|
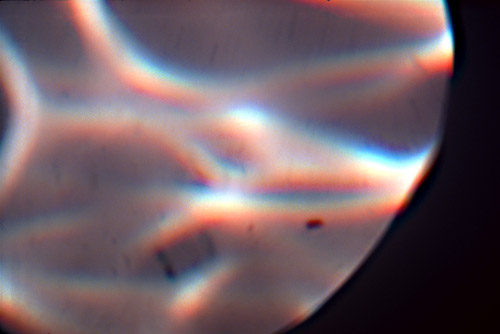
Sunray
Refractions at Water Surface
Afocal underwater, using stacked
ND400 and ND 4 filters, Fuji Superia 800 film. Water
surface-mediated "light flashes" are amongst
the easiest motifs to capture with afocal methods.
Perhaps you get a 1:100 keeper ratio, which for this kind
of work is excellent ...
© Bjørn Rørslett/NN 2002
|